


Providing a seamless, one-click demo import experience is crucial for modern WordPress themes. It allows users to instantly recreate the demo website on their installation, including pages, posts, widgets, menus, theme settings, and required plugins.
The most widely used tool for this purpose is the One Click Demo Import (OCDI) plugin.
This guide will walk you through basic integration, advanced integration, plugin installation management, and professional finishing touches.
Why Should Your Theme Offer Demo Import?
- Immediate User Satisfaction: Instant setup = happy users.
- Reduced Support Workload: Fewer “how to setup like demo?” tickets.
- Higher Conversion Rates: Users love a plug-and-play solution.
- Professional Touch: Competes with premium marketplace themes.
Step 1: Install and Recommend the OCDI Plugin
First, you need to ensure the One Click Demo Import plugin is installed.
You should recommend it using the TGMPA (TGM Plugin Activation) library:
array(
    'name'     => 'One Click Demo Import',
    'slug'     => 'one-click-demo-import',
    'required' => false,
),
- OCDI should be optional, but highly recommended.
- This ensures the demo import functionality becomes available under Appearance → Demo Importer.
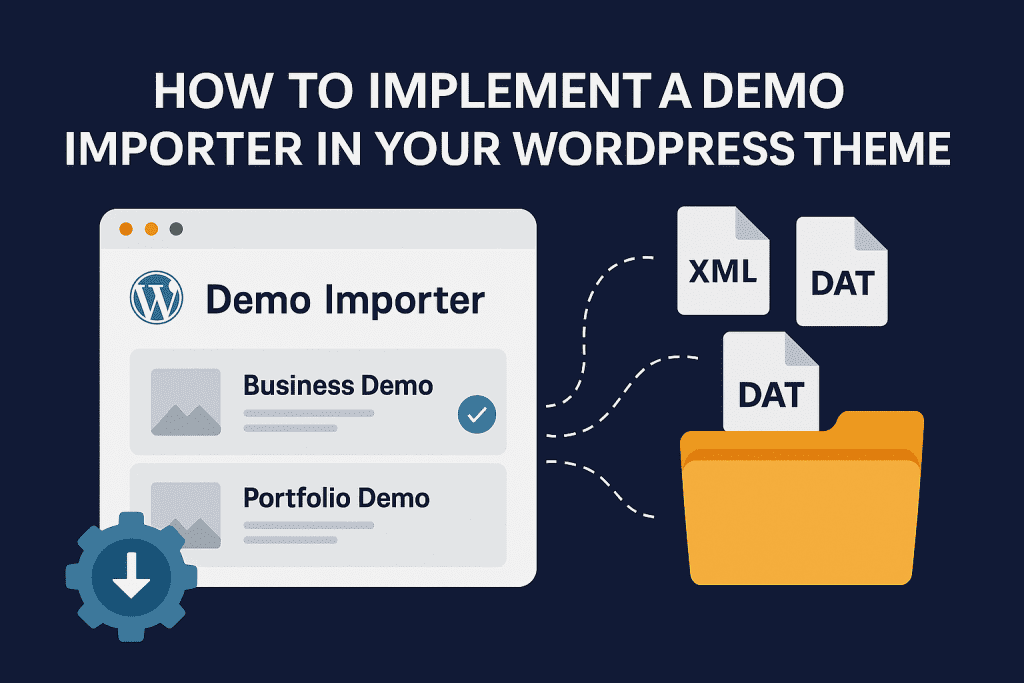
Step 2: Basic Demo Import Setup (Quick Integration)
Now, hook into the ocdi/import_files filter to define your demo content.
add_filter( 'ocdi/import_files', function() {
    return [
        [
            'import_file_name'           => 'Business Demo',
            'local_import_file'          => trailingslashit( get_template_directory() ) . 'demo-content/business/content.xml',
            'local_import_widget_file'   => trailingslashit( get_template_directory() ) . 'demo-content/business/widgets.wie',
            'import_customizer_file_url' => get_template_directory_uri() . '/demo-content/business/customizer.dat',
            'import_notice'              => __( 'After import, set your homepage manually.', 'your-theme-textdomain' ),
            'preview_url'                => 'https://yourdemo.com/business',
        ],
        [
            'import_file_name'           => 'Portfolio Demo',
            'local_import_file'          => trailingslashit( get_template_directory() ) . 'demo-content/portfolio/content.xml',
            'local_import_widget_file'   => trailingslashit( get_template_directory() ) . 'demo-content/portfolio/widgets.wie',
            'import_customizer_file_url' => get_template_directory_uri() . '/demo-content/portfolio/customizer.dat',
            'import_notice'              => __( 'After import, set homepage manually.', 'your-theme-textdomain' ),
            'preview_url'                => 'https://yourdemo.com/portfolio',
        ],
    ];
});
✅ Users can now choose between multiple demos to import!
Step 3: Set Up After Import (Homepage, Menus)
You want users’ sites to be production-ready immediately.
Use the ocdi/after_import hook:
add_action( 'ocdi/after_import', function( $selected_import ) {

    // Set menu
    $main_menu = get_term_by( 'name', 'Main Menu', 'nav_menu' );
    if ( $main_menu ) {
        set_theme_mod( 'nav_menu_locations', [ 'primary' => $main_menu->term_id ] );
    }

    // Set homepage and blog
    $front_page = get_page_by_title( 'Home' );
    $blog_page  = get_page_by_title( 'Blog' );

    if ( $front_page && $blog_page ) {
        update_option( 'show_on_front', 'page' );
        update_option( 'page_on_front', $front_page->ID );
        update_option( 'page_for_posts', $blog_page->ID );
    }

});
Step 4: Automatically Install Required Plugins per Demo
A real-world professional demo often depends on specific plugins (like Elementor, Contact Form 7, WooCommerce).
✅ OCDI supports required plugins per demo!
You can define it like this:
add_filter( 'ocdi/import_files', function() {
    return [
        [
            'import_file_name'           => 'Business Demo',
            'local_import_file'          => trailingslashit( get_template_directory() ) . 'demo-content/business/content.xml',
            'local_import_widget_file'   => trailingslashit( get_template_directory() ) . 'demo-content/business/widgets.wie',
            'import_customizer_file_url' => get_template_directory_uri() . '/demo-content/business/customizer.dat',
            'preview_url'                => 'https://yourdemo.com/business',
            'required_plugins'           => ['elementor', 'contact-form-7'],
            'import_notice'              => __( 'Install Elementor and Contact Form 7 if not already installed.', 'your-theme-textdomain' ),
        ],
        [
            'import_file_name'           => 'Portfolio Demo',
            'local_import_file'          => trailingslashit( get_template_directory() ) . 'demo-content/portfolio/content.xml',
            'local_import_widget_file'   => trailingslashit( get_template_directory() ) . 'demo-content/portfolio/widgets.wie',
            'import_customizer_file_url' => get_template_directory_uri() . '/demo-content/portfolio/customizer.dat',
            'preview_url'                => 'https://yourdemo.com/portfolio',
            'required_plugins'           => ['elementor', 'advanced-custom-fields'],
            'import_notice'              => __( 'Please install Elementor and ACF plugins.', 'your-theme-textdomain' ),
        ],
    ];
});
✅ The OCDI plugin will:
- Show a warning if required plugins are missing.
- Guide the user to install and activate those plugins.
Step 5: Customize Demo Import Page (Brand It)
Make your demo import page look branded and professional:
add_filter( 'ocdi/plugin_page_setup', function( $setup ) {
    return [
        'parent_slug' => 'themes.php',
        'page_title'  => __( 'Import Demo Data', 'your-theme-textdomain' ),
        'menu_title'  => __( 'Demo Importer', 'your-theme-textdomain' ),
        'capability'  => 'import',
        'menu_slug'   => 'demo-importer',
    ];
});
✅ Result: Instead of a generic “One Click Demo Import” page, users see a custom, theme-branded Demo Import page.
Step 6: Handling Remote Demo Files (Recommended for Large Themes)
Instead of packing large XML files inside your theme, host demo files remotely on a server and load them via URLs:
'import_file_url' => 'https://yourserver.com/demo-content/business/content.xml',
'local_import_widget_file' => '',
'import_customizer_file_url' => 'https://yourserver.com/demo-content/business/customizer.dat',
Advantages:
- Smaller theme size.
- Easier to update demo files without releasing a new theme version.
- Faster downloads (if CDN used).
Step 7: Final Touches for an Outstanding Experience
| Tip | Why It Matters |
|---|---|
| ✅ Show a “Next Steps” message after import | Guide users to edit pages or customize |
| ✅ Recommend Regenerate Thumbnails plugin | Fix image size issues automatically |
| ✅ Pre-build Contact Forms and Footer Widgets | Saves users time |
| ✅ Include dummy WooCommerce products if needed | Full shop setup out of the box |
| ✅ Keep demo content lightweight | Import faster and cause fewer PHP timeouts |
| ✅ Provide helpful documentation | Link to a “Getting Started” guide after import |
Common Mistakes to Avoid
| Mistake | Better Approach |
|---|---|
| Bundling heavy media (500MB+) | Optimize demo files, use lower-res images |
| Hardcoding menu names | Always check if menus exist before assignment |
| Ignoring plugin dependencies | Always list required plugins |
| Poor UI messages | Add friendly notices like “Almost done! Customize your site now!” |
Conclusion
A professional demo importer setup massively boosts your theme’s usability and attractiveness.
By using One Click Demo Import, you can:
- Allow users to set up websites within minutes.
- Automatically install required plugins per demo.
- Configure homepage, blog, menus, and widgets automatically.
- Deliver a smooth, premium experience that users and customers will love.
Useful Resources:
BONUS: Ideal Folder Structure Example for Theme
your-theme/
│
├── demo-content/
│   ├── business/
│   │   ├── content.xml
│   │   ├── widgets.wie
│   │   ├── customizer.dat
│   ├── portfolio/
│       ├── content.xml
│       ├── widgets.wie
│       ├── customizer.dat
│
├── functions.php
├── style.css
├── inc/
│   ├── demo-importer.php (all OCDI related code here)
✅ Organizing your project cleanly like this makes it scalable for future demos!
Would you like me to also prepare a sample full PHP file for a real-world demo-importer.php setup that you can directly use in your theme? 🚀